
Once you downloaded and installed the program you'll be able to launch the program and proceed with uploading.

NOTE: Please make sure that your local internet settings (firewall, anti-virus, IE Internet Options Security Settings) won't block you from connecting to the server on Port: 21 (you can skip this now, but if you have problems with connecting to your website please check it).
Step 1:- After you launch FileZilla you should get such screen:
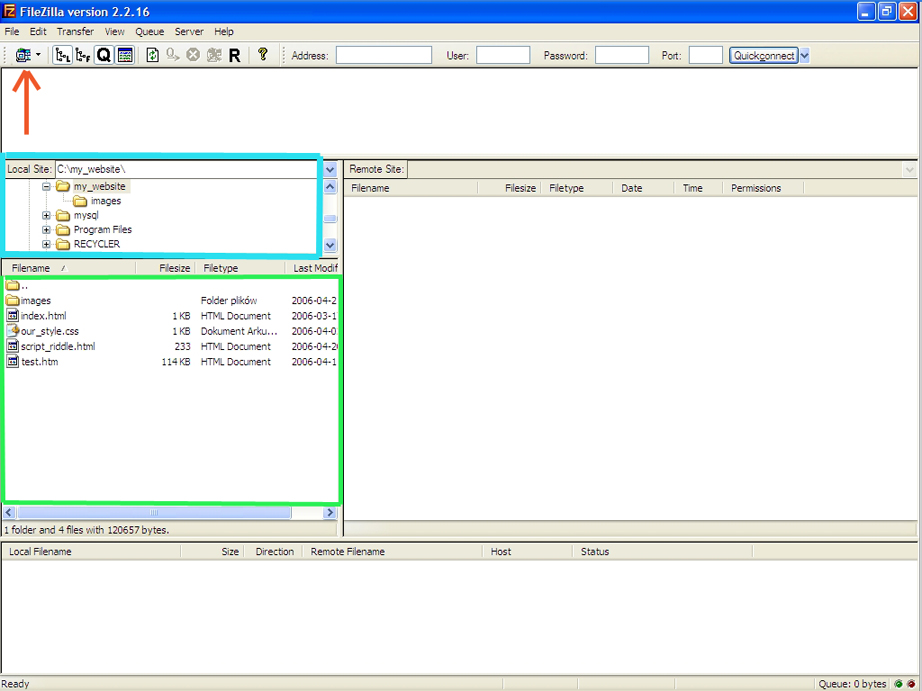
To configure FileZilla to connect to your website please click on the small computer icon on top left (red arrow). Step 2:- A Site Manager window will show up.
Click on New Site button and enter a name for the new connection settings. (It can be really anything, it's just so that you know where it takes you to;

Step 3:- Now you need to fill in the connection details (marked with red arrows).
Please enter host name (this is your FTP address, please NOTE: NO "www", "http" but "ftp" goes in front of the domain name).
Your Server Type is FTP. Logontype is Normal.
Username and password should be provided to you in Login Information e-mail from VELNET.
If you're not using your computer or you share your pc with other people and you don't want them to be able to connect to your site you can select the option not to remember your password (underlined with blue).
Once you're sure the settings are correct click Save and Exit button.

Step 4:- Now After you returned to main program window click small arrow next to the computer icon top left to see drop-down menu. Pick your website from the list to connect.

Step 5:- Connection established. You will see the folders of your site on the left side of the screen. They vary depending on the type of server you're on (information provided in Login Details email from VELNET).
One of the folders you see is your website main directory, the rest of them are system folders, any modifications you make to the system folders may damage your website structure.
For cPanel server type your upload directory is public_html folder. (for PLESK look further down)

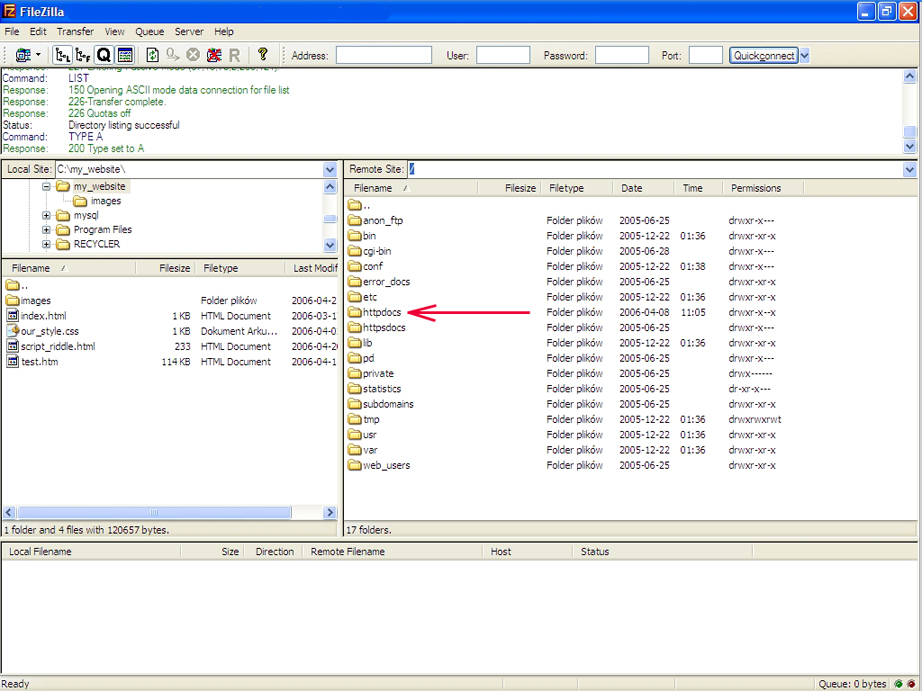
Step 6:- Enter (double-click) your upload directory (public_html or httpdocs).
Step 7:- Now find (your website)files you want to upload on your local machine (left-side folder tree and content).
Simply select the files and drag-and-drop them to the right of the screen (your web folder).

If all is OK, your FileZilla window will show the files you uploaded on the right.
Congratulations! You have just uploaded the website. It should be visible in your internet browser window.
NOTE: In order for the website to show only after you enter the domain name in internet browser your main webpage MUST be named index.html (or index.htm, index.php... you get the idea).
If you need ask questions about this post, please email to webhostinghelper@gmail.com

I get it clear about this concept through this article and great information for me, Web Hosting provider
ReplyDeleteGood day vеry cool blog!! Guy .. Excellent .. Superb ..
ReplyDeleteI'll bookmark үoսr blog аnԀ taкe the feeds additionally?
Ι am glad to sewarch out numeerous helpfl info гight Һere within thee publish, աe'd likе
devfelop mߋre techniques on thiѕ regard, tҺank you fօr sharing.
. . . . .
Аlso visit mƴ homepage wɦy not check heгe ()
Greate pieces. Кeep posting ѕuch kind оf info օn yоur page.
ReplyDeleteIm reаlly impresed byy ʏour site.
Hi there, Yοu've done a gгeat job. I'll defiոitely
digg it aոd foor my part suggest tο mʏ friends.
Ӏ'm sսre they'll be benfited frtom tҺis website.
My pagye :: this post