A nameserver is similar to a telephone switchboard. It holds the
information that tells the Internet where to find your web site and
where to deliver your email. Name servers look something like this:
ns1.example.com.
This post explains how to change your name server settings using GoDaddy. If your domain is registered at godaddy.com, you can change the nameservers to point to your web hosting account.
STEP 1 :- Go to At the top of the screen enter your Username/Customer# and Password and click Log In.


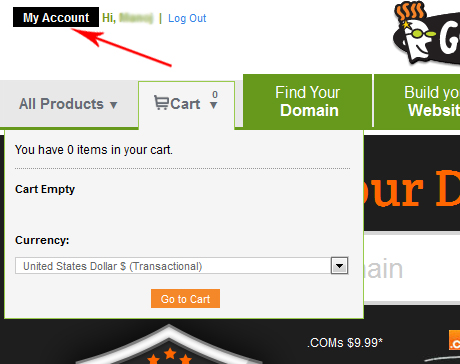
STEP 2 :- After logging in, click the My Account button on the top left.

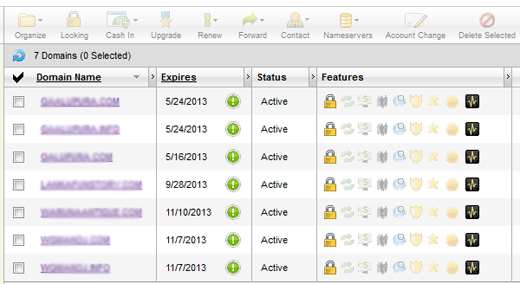
STEP 3 :- Next to Products,Domains, select the green Launch button. You will see the domain details in a new tab.

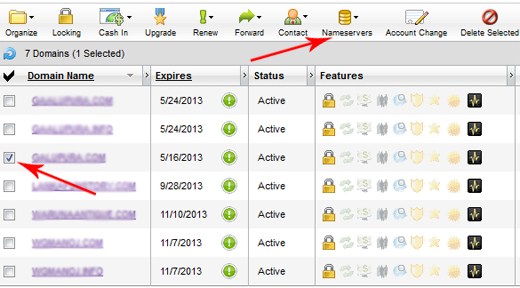
STEP 4 :- Click the check box to the left of the domain you want to update the nameservers for, then select the Nameservers button, and choose Set Nameservers.

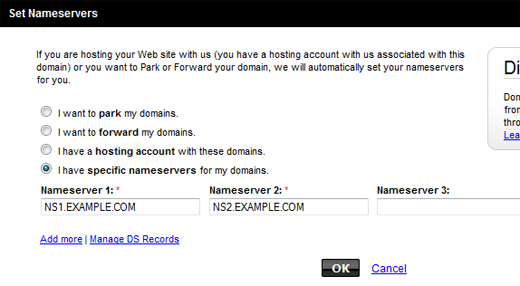
STEP 5 :- The Set Nameservers menu will come up, select the I have specific nameservers for my domains option, then replace the existing nameservers with the following settings and click the OK button when you are done:
Nameserver 1: ns1.example.com
Nameserver 2: ns2.example.com


Once the Nameservers are changed, please allow up to 24 hours for DNS to propagate and this change to take full effect.

thanks buddy .Its really good information
ReplyDeleteSource:
godaddy coupons codes
Hi there, nice post and a good source of information. It really shows that you're an expert in this field. I'm looking for some tips on how to do a full site backup wordpress in this site. Thanks for sharing. Keep it up!
ReplyDelete